
Sign up to save your podcasts
Or

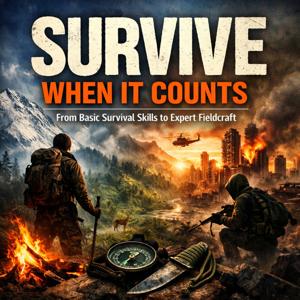


Primitive skills can look like a return to an older, simpler way of living. In reality, they demand patience, observation, and sound judgement. Learning to make cordage, build a useful shelter, or start a fire without a lighter can deepen your understanding of the outdoors—but these skills are best treated as backups and learning tools, not substitutes for preparation. In this episode, we explore how traditional techniques fit into a modern approach to survival.
First, primitive skills begin with reading what’s around you. Before collecting materials, take time to notice the terrain, wind, temperature, available water, and signs of changing weather. Look for resources that are already loose or dead rather than damaging living plants. Check local rules, too: collecting wood, plants, or other natural materials may be restricted. The aim is not to take as much as possible, but to understand what the environment can responsibly provide.
Fire-making is one of the most familiar primitive skills, and one of the easiest to underestimate. Friction methods require suitable materials, dry conditions, and plenty of practice; they rarely work like a quick trick in a survival video. Prepare a range of fine, dry tinder before attempting to create an ember, and protect your work from wind and damp ground. Keep a modern ignition source in your kit, follow fire restrictions, and never leave a fire unattended. A skill that cannot be used safely is not a reliable survival skill.
Next, consider shelter and cordage. A simple debris shelter can help reduce exposure when conditions are mild and materials are plentiful, while twisted plant fibres can demonstrate how basic cordage is made. But both take time and energy. Before building, weigh the weather, daylight, your physical condition, and the possibility of getting help. In an emergency, an emergency blanket or tarp may offer faster, more dependable protection. Primitive construction is valuable practice; it is not always the smartest immediate choice.
Toolmaking and food gathering call for especially careful judgement. Learning how stone, wood, and natural fibres can be shaped into useful tools offers a fascinating look at human ingenuity, but improvised tools can break or cause injury. Foraging carries its own risks: a mistaken identification can lead to serious illness, and safe-looking plants may be contaminated. Don’t eat wild plants or fungi unless you can identify them with confidence using trusted expertise. In most situations, carrying food and a first-aid kit is safer than relying on improvisation.
The most useful lesson from primitive skills may be the way they train attention and adaptability. Practice in a controlled setting, begin with low-risk tasks, and record what works under different conditions. Pair traditional methods with navigation, first aid, water planning, and dependable modern equipment. Confidence should come from understanding both your abilities and their limits—not from assuming that a difficult technique will succeed when you need it most.
Primitive skills connect us to the basics of survival: making use of materials, managing effort, and paying close attention to the environment. Learn them with respect for the land, realistic expectations, and a safety-first mindset. The goal is not to prove you can live without modern tools. It’s to become more capable, more observant, and better prepared when conditions turn challenging.
When people talk about survival knots, it’s easy to picture an elaborate collection of loops and crossings. But in the field, the best knot is usually the simplest one you can tie correctly, remember under stress, and trust for the task at hand. A knot can help secure a shelter, bundle gear, or attach a line to an anchor. It can also fail if it’s tied poorly, used in the wrong material, or loaded beyond its limits. Today, we’ll focus on a few useful knots and, just as importantly, how to think about using them safely.
Start with the bowline, a reliable way to make a fixed loop at the end of a rope. It’s useful for attaching a line around a suitable anchor or creating a loop that won’t tighten down as the rope is loaded. Learn the tying sequence slowly, then practice until you can do it without guessing. Before relying on it, check that the knot is dressed neatly, the strands lie correctly, and there’s enough tail beyond the knot. A bowline can loosen when it’s slack or shaken, so it may need a backup depending on the situation. No single knot is right for every rope or load.
For securing a line around a post or tree, the clove hitch is quick and easy to adjust. It can help position a ridgeline for a tarp or fasten a line temporarily while you work. Its convenience comes with a caution: under changing or uneven tension, it can slip, and some rope surfaces make that more likely. Test it with a gentle pull before trusting it, and use an appropriate backup when the consequences of failure matter. For shelter building, the trucker’s hitch can also be useful because it creates mechanical advantage for tightening a ridgeline. Tie it carefully, keep the line clear of sharp edges, and avoid hauling so hard that you damage the rope or your anchor.
Another practical knot is the sheet bend, which joins two ropes, including ropes of different thicknesses. It’s handy when one line is too short, but the connection should be arranged and checked correctly: the thicker rope forms the main loop, and the thinner rope wraps through it. If the ropes are slick, very different in size, or under changing loads, the join may be less dependable. Knots reduce a rope’s strength, and a knot that works for a tarp or bundle is not automatically safe for climbing, lifting a person, or any life-critical job. Use equipment and training designed for those tasks.
The real skill is not memorizing a long list; it’s matching the knot to the job. Practice with the same kind of cord you expect to use, in good light and with cold or gloved hands when possible. After tying, inspect the knot, test it cautiously, and check it again after the line has been loaded. Keep your cordage in good condition, and make sure anchors are stable before tensioning a line.
Survival knots are small tools, but sound judgment makes them useful. Learn a few well, know their limits, and build confidence through repetition. In the field, a simple knot tied correctly—and checked before you depend on it—can make camp setup calmer, safer, and more reliable.
Animal tracking is less about spotting a perfect paw print and more about learning to notice what the landscape is quietly telling you. In this episode, we build on the survival basics of observation and sound judgement to explore a field skill that rewards patience. Tracks can reveal which animals passed through, what they were doing, and sometimes how long ago they were there—but no single clue tells the whole story.
Start with the ground beneath your feet. Mud, sand, snow, and soft soil preserve impressions far better than gravel or leaf litter, so a missing track does not mean an animal was absent. Look for clear details such as toe marks, claws, the shape of the heel pad, and the spacing between prints. Notice scale, but avoid relying on size alone: prints can spread in soft ground, shrink in hard ground, or belong to a young animal. Compare several impressions rather than drawing a conclusion from one.
Next, read the trail as a sequence. The distance between steps, the direction of travel, and changes in pace can offer clues about movement. A steady line of prints may suggest ordinary travel; a sudden change in spacing might mean the animal sped up, slowed down, or changed direction. But tracks are easily distorted by terrain, wind, rain, and other animals. Treat your interpretation as a working hypothesis, not a certainty—and look for supporting evidence before you settle on an answer.
That supporting evidence is often called sign: droppings, feathers or fur, disturbed leaves, feeding marks, and paths through vegetation. Context matters. A trail leading toward water, shelter, or a feeding area may help explain why an animal was moving through the landscape. Weather and time matter too. Rain can soften edges, while wind may cover prints; shade and ground conditions can preserve them for very different lengths of time. Freshness estimates are rough, so don’t mistake a confident guess for a reliable clock.
Good animal tracking also means knowing when not to follow. Keep a respectful distance, never corner wildlife, and be especially cautious around large animals, protective parents, or unfamiliar species. Don’t disturb nests, dens, or feeding sites, and follow local rules about wildlife and protected areas. If you find a trail that leads toward a potentially dangerous animal, choose space and safety over curiosity. The aim is to understand the signs, not to force an encounter.
For practice, choose a familiar, low-risk area and move slowly. Pause often, scan the ground at different angles, and record what you observe before naming the animal. A sketch or photo can help you compare details later, while a simple field notebook encourages honest observation: what you saw, what you think it means, and what remains uncertain. Over time, animal tracking strengthens attention, patience, and decision-making—skills that matter well beyond the trail. The landscape rarely gives a complete answer, but careful observation can help you ask better questions and move through it with greater confidence.
When your phone goes dark and the map is out of reach, the sky can still offer clues about where you are—and which way you’re moving. In this episode, we explore celestial navigation: the practice of using the sun, stars, and other heavenly bodies to orient yourself and estimate your position. It’s a useful skill, but not magic. It takes observation, preparation, and a clear understanding of what the sky can—and can’t—tell you.
First, start with direction. The sun rises roughly in the east and sets roughly in the west, but the exact points shift with the season and your location. At midday in the Northern Hemisphere, the sun is generally toward the south; in the Southern Hemisphere, it is generally toward the north. These are broad guides, not precise compass bearings. Clouds, terrain, and the time of year can complicate the picture, so use the sun alongside a map, compass, or other reliable clues rather than treating it as a perfect instrument.
At night, familiar stars can help you find a general direction. In the Northern Hemisphere, Polaris—the North Star—sits close to the north celestial pole, making it a practical indicator of north. You can locate it using the familiar pointer stars in the Big Dipper, though the constellation may be low or hidden depending on where you are. In the Southern Hemisphere, there is no bright star directly marking the south celestial pole. The Southern Cross can help you estimate its position, but the method requires care and practice. Before relying on any star pattern in the field, learn to recognize it from your own region and at different times of year.
Direction is only part of navigation. Celestial navigation can also help estimate latitude. Polaris’s height above the horizon is approximately equal to your latitude in the Northern Hemisphere, provided you can see a clear horizon and measure the angle reasonably well. A basic angle-measuring tool can improve the estimate, but even a rough observation is not a substitute for a plotted position. Longitude is harder: finding it accurately traditionally depends on precise timekeeping and careful observations. That’s why a glance at the sky can orient you, but it rarely gives you a complete, exact location on its own.
Good field practice begins before you set out. Check a star chart or reliable navigation reference, note when and where key stars will be visible, and carry a map and compass. Keep a written record of your direction of travel and major landmarks. If the weather closes in, the horizon disappears, or you’re tired and uncertain, stop and reassess instead of pressing on. Celestial cues are most useful when they confirm a plan—not when you’re trying to improvise one under pressure.
The deeper lesson is patience. The sky changes predictably, but reading it well asks you to slow down, notice patterns, and admit uncertainty. Practice celestial navigation on familiar ground in daylight and darkness, then compare your estimates with a compass or map. Build that habit now, and if technology fails later, the sky may help you stay oriented—and make a calmer, safer decision about what to do next.
When people hear “survival,” they often picture a remote wilderness and a dramatic rescue. But personal preparedness usually begins much closer to home: a power outage, a winter storm, a delayed journey, or a situation where help takes longer than expected. In this episode, we’ll look at how to prepare without panic or piles of expensive equipment. The aim is simple: make sensible choices before trouble starts, so you can think clearly when it does.
First, understand the risks that are realistic for your life. A household in a flood-prone area has different priorities from someone who regularly drives through remote country. Think about where you live, how you travel, the weather you face, and who depends on you. Include practical details such as medications, mobility needs, pets, and how you would contact family if mobile service failed. Personal preparedness is not about predicting every emergency; it is about noticing the likely problems and making a few useful plans for them.
Next, build a basic 72-hour supply that you can actually maintain. Store drinking water and familiar, shelf-stable food, along with a flashlight, spare batteries or a power bank, a first-aid kit, essential medicines, warm layers, hygiene supplies, and a battery- or hand-powered radio where appropriate. Keep items somewhere accessible, and check expiry dates and batteries on a schedule. Tailor the kit to your household rather than copying a generic list. A supply you understand and can use is more valuable than an impressive bag you have never opened.
Third, make a plan that works when normal routines are disrupted. Choose meeting places, identify an out-of-area contact, and decide how you’ll share important updates if family members are separated. Know how to shut off utilities if it is safe and necessary, and learn the evacuation guidance for your area. Keep key information—such as emergency contacts and medication details—in a form you can reach without relying on a charged phone. Talk through the plan together. A plan that everyone knows is easier to follow than one hidden in a drawer.
Finally, practise the skills that turn equipment into capability. Learn basic first aid from a reputable course, use your stove or water filter according to its instructions, and try operating your flashlight and radio before an emergency. Review your plan after a move, a new job, a change in health, or a new family need. Practice should be calm and realistic: the goal is familiarity, not fear. Good preparation also includes knowing when not to improvise and when to follow official instructions or seek professional help.
Personal preparedness is less about becoming self-sufficient in every circumstance and more about buying time, reducing avoidable risks, and making good decisions under pressure. Start with one small improvement this week: check your water, write down an emergency contact, or put a light where you can find it in the dark. Then build steadily. Across this survival journey, the strongest fieldcraft begins with awareness and judgement—and those can be practised long before conditions turn hostile.
Outdoor preparedness isn’t about packing every gadget on the shelf or expecting the worst around every corner. It’s about making sensible decisions before you leave, carrying what you need, and knowing how to respond if a day outdoors doesn’t go to plan. Whether you’re heading out for a short walk or a remote camping trip, the same principle applies: preparation gives you more options when conditions change.
Start with the plan. Check the route, distance, terrain, forecast, and daylight hours, then choose an outing that matches your experience and fitness. Tell someone where you’re going, when you expect to return, and what they should do if you’re overdue. If your plans change, update them when you can. A straightforward route plan and a reliable check-in can make a major difference in an emergency.
Next, think about the essentials that protect you from exposure. Dress in layers so you can adjust to changing temperatures and activity levels, and bring protection from rain and wind even when the forecast looks clear. Pack water and know how you’ll get more if the trip runs longer than expected. A filter or other treatment method can help make water from natural sources safer, but it’s important to understand how to use it correctly. Carry a shelter option suited to the conditions, such as a tent, tarp, or emergency bivy, and keep key items dry.
Navigation deserves more than a quick glance at a phone before you set off. Carry a map and compass, know how to use them, and bring a charged phone with an offline map as a useful backup. A battery pack can help, but electronics can fail, lose reception, or run out of power. Pay attention to landmarks as you travel, and check your location regularly rather than waiting until you’re uncertain. If you realize you’re lost, pause, stay calm, and avoid making hurried choices that could take you farther from familiar ground.
Your kit should also help you manage small problems before they become serious ones. Include a first-aid kit you know how to use, any personal medication, a light source, extra food, and a way to signal for help. A whistle and a bright-colored item can be useful, while an emergency beacon may be appropriate for remote trips where phone coverage is unreliable. Choose gear for your actual destination and conditions; a compact, well-understood kit is usually more helpful than a heavy pack full of items you haven’t practiced with.
Finally, practice before you need the skills. Test your rainwear, learn your stove’s instructions, try setting up your shelter, and take a navigation course or practice with a map on familiar trails. Outdoor preparedness is built through small habits: checking the forecast, packing deliberately, and noticing when fatigue or weather is changing the risk. The goal isn’t to eliminate uncertainty. It’s to meet it with a clear plan, useful skills, and enough confidence to make the next good decision.
When people hear “survival supplies,” they often picture a packed bag full of specialist equipment. But the best kit isn’t the biggest or most expensive. It’s the set of useful, reliable items you understand how to use—and can reach when things go wrong. In this episode, we’ll build a practical way to think about supplies, whether you’re heading into the backcountry, preparing your vehicle, or making a plan for an emergency at home.
Start with the problems your supplies need to solve. In the short term, the essentials are maintaining body temperature, getting safe water, dealing with injuries, and finding a way to communicate or get help. A simple planning question is: “What could happen here, and what would help me respond?” A day hike in mild weather calls for a different kit than a winter trip, a remote journey, or a household power outage. Survival supplies should match the place, season, duration, people involved, and likely hazards—not a generic checklist alone.
Water is a good example of why both equipment and know-how matter. Carry enough drinking water for the outing, then consider how you would treat more if your plans change. A filter, chemical treatment, or means of boiling can help, but each has limits and needs to be used according to its instructions. Don’t assume that clear water is safe, and don’t rely on a single method without understanding how it works. Store some water at home, too, and rotate it as recommended. A water container is useful only if it’s clean, intact, and easy to fill.
Next, think about warmth, shelter, and light. In changing weather, a spare insulating layer and a waterproof outer layer can matter more than a pile of gadgets. A compact emergency shelter or bivvy may help reduce exposure while you wait for assistance, but it won’t replace choosing suitable clothing and planning around the forecast. Add a dependable light with spare or rechargeable power, and keep it where you can find it in the dark. Test items before relying on them, especially batteries, zippers, and anything intended to keep rain or cold out.
Round out the kit with first aid, communication, and practical tools. Carry a first-aid kit suited to your group and your training; include personal medication and know when to call for professional help. A charged phone, backup power, and a whistle can support signalling, but coverage and battery life are never guaranteed. A knife or multitool, fire-starting equipment, and simple repair items can be valuable when you know how to use them safely. For home and vehicle preparedness, include food, essential medications, sanitation items, and supplies for everyone—including children, older adults, and pets.
Finally, treat your survival supplies as a system, not a one-time purchase. Pack them, practise with them, check expiry dates, and adjust them after each trip or season. Keep emergency items accessible, tell someone what your plan is, and learn the skills that make your equipment useful. The goal isn’t to carry everything. It’s to carry what fits your risks, understand its limits, and make calm decisions when conditions change.
When something goes wrong outdoors, it’s tempting to rush into action: build a fire, find water, or start walking toward what looks like the right direction. But survival is rarely about doing the most dramatic thing first. It’s about noticing what matters now, choosing a sensible next step, and avoiding decisions that make the situation worse. In this episode, we’re looking at survival priorities: a simple way to organize your thinking when stress and uncertainty take over.
First, pause and assess. A few calm seconds can prevent hours of trouble. Stop moving, breathe slowly, and look around. Are you injured? Is there an immediate danger such as rising water, falling branches, traffic, fire, or extreme exposure? Check yourself and anyone with you, then deal with urgent hazards before moving on. This is not about pretending everything is fine. It’s about giving your brain enough room to make a useful decision. If you’re lost, continuing to wander without a plan can turn a manageable problem into a much bigger one.
Next, make yourself as safe as possible. Treat serious injuries, get away from immediate hazards, and protect yourself from the conditions. In cold or wet weather, shelter and dry insulation may matter more urgently than finding a stream. In intense heat, shade and reducing exertion may come first. There is no single checklist that works in exactly the same order everywhere; the environment, your health, and the time of day all change the calculation. The useful question is: what is most likely to harm us in the next few minutes or hours?
Once the immediate danger is under control, think about the essentials: shelter, water, warmth, and a way to signal for help. Shelter can mean using a safe existing structure or creating protection from wind, rain, sun, or cold—not necessarily building an elaborate camp. Water matters, but don’t assume that drinking any available water is safe. Use a reliable treatment method when possible, and remember that a fire is only helpful when it can be built safely and serves a real purpose. A visible signal, whistle, phone call, or emergency beacon may be more valuable than spending energy on a task that doesn’t improve your chances.
Then make a plan and keep checking it. If you have a phone, map, compass, or emergency gear, use it thoughtfully and conserve power where appropriate. Tell rescuers your location and situation if you can. If you’re with others, share tasks, keep everyone informed, and agree on a plan before anyone moves away. Set a clear reason to reconsider your choice: changing weather, worsening symptoms, or a new hazard may mean it’s time to adapt. Good survival decisions are not stubborn; they respond to what’s actually happening.
Survival priorities aren’t a magic formula. They’re a way to replace panic with a sequence: pause, assess, address immediate threats, protect your body, and seek help or make a careful plan. Practise that sequence on ordinary outings, when the stakes are low. The more familiar it feels, the easier it is to think clearly when conditions turn hostile. In survival, calm judgement is not a bonus skill. It’s the foundation that makes every other skill more useful.
Survival equipment is easy to overthink. A pack full of impressive tools may look reassuring, but equipment only helps when it suits the conditions, works when you need it, and is simple enough to use under stress. In this episode, we look at how to choose a practical kit—not as a substitute for skill and judgement, but as support for them.
Start with the essentials that address immediate threats. In many situations, that means having a way to stay warm and dry, access to safe drinking water, a dependable light, basic first-aid supplies, and a way to signal for help. The exact choices depend on where you are, the season, how long you’ll be out, and whether you’re travelling on foot or by vehicle. A compact shelter and extra insulation may matter greatly in cold, wet terrain; in hot conditions, water capacity and sun protection may take priority. Build your kit around the risks you can reasonably expect, not a generic checklist alone.
Next, think in layers and backups. Your everyday carry, day pack, vehicle kit, and home emergency supplies each have different jobs. A small light on your person is useful if your pack is lost or out of reach; a larger light can serve around camp. A fire-starting method is valuable, but don’t assume fire will always be possible or appropriate. Carry more than one way to meet critical needs when practical, while avoiding so much duplication that the kit becomes too heavy or confusing. A backup is only useful if you know where it is and can operate it.
Choose equipment you can use confidently. A complicated water filter, unfamiliar stove, or multi-tool with features you’ve never practised may become a burden in a stressful moment. Learn how your gear works before relying on it: set up the shelter in poor light, treat water according to the manufacturer’s instructions, and practise using a compass alongside a map. Check expiry dates, batteries, fuel, seals, and first-aid contents regularly. Small maintenance habits can prevent a minor failure from becoming a serious problem.
Finally, balance capability with weight, comfort, and common sense. Test your pack on realistic outings and notice what you actually use, what is awkward to reach, and what you can safely leave behind. Keep essential items protected from rain, and organize them so you can find them quickly without emptying everything onto the ground. No piece of survival equipment guarantees safety, and carrying gear never replaces telling someone your route, checking the forecast, or turning back when conditions demand it.
The goal is not to own the most equipment; it’s to have a dependable system that matches your environment and your abilities. Start with the basics, practise with them, and improve your setup after each trip. When pressure rises, familiar tools and clear priorities make it easier to think, act, and ask for help. That’s what turns a collection of gear into useful preparation.
Survival is rarely about one dramatic trick. More often, it comes down to noticing what is happening, staying calm enough to make a sound decision, and taking the next useful step. In this episode, we’re looking at survival techniques as a connected set of skills—not a checklist to follow blindly, but a way to think clearly when conditions become difficult.
Start with the foundations: mindset and priorities. Stress can narrow your attention and push you into hurried choices, so pause before acting. Check for immediate dangers, take stock of injuries and resources, and decide what matters most right now. In many situations, that means protecting yourself from exposure, finding or treating water, and making yourself easier to locate. The right order depends on the circumstances, so observation and judgement matter as much as practical skill.
Next, build competence in the essentials. Shelter and clothing help manage heat loss, wind, rain, and sun; fire can provide warmth and support other camp needs, but it should only be made where conditions and local rules allow. Water must be gathered and treated safely using a reliable method appropriate to the source. Navigation and emergency signalling deserve equal attention: know how to avoid becoming more lost, and make a plan for attracting attention rather than assuming someone will find you by chance.
Good fieldcraft also includes the less dramatic routines that keep small problems from becoming serious ones. Choose a camp with hazards in mind, keep food and equipment organised, and maintain basic hygiene. Learn simple first aid and recognise when an injury or illness calls for professional help. Pay attention to changing weather, and treat foraging cautiously: never eat a plant or mushroom unless you can identify it with confidence. These habits reduce risk and preserve energy for the decisions that matter.
Then consider how the environment changes the plan. Cold, heat, mountains, jungle, coastline, and urban emergencies each bring different hazards. A river crossing, night movement, or exposed ridge can turn a manageable day into a high-risk one if you rush. Before moving, weigh the route, weather, visibility, your condition, and the consequences of a mistake. Sometimes the safest technique is to stop, shelter, and reassess.
Preparation connects these skills to everyday life. A practical vehicle kit, home supplies, and a realistic 72-hour plan can make an emergency less chaotic. Think through whether staying put or leaving is safer, where you would go, how you would communicate, and what essential medication or equipment you need. Plans should be simple enough to use under pressure and flexible enough to change when the facts change.
As skills deepen, advanced navigation, tracking, concealment, leadership, and survival psychology become more relevant. They still rest on the same foundation: assess risk, avoid unnecessary exposure, communicate clearly, and conserve energy. Scenarios and practice can reveal gaps before a real emergency does, but training should be conducted safely and within your abilities.
The goal is not to become fearless or to master every technique at once. It’s to build a reliable foundation, practise deliberately, and make better choices one step at a time. Survival techniques are most useful when paired with patience, preparation, and sound judgement—and that’s where confidence begins.