eunice9200 3Speak Podcast

eunice9200 3Speak Podcast

By Eunice
Download on the App Store

eunice9200 3Speak Podcast episodes

  • How I Cooked Perfect Smoky Party Jollof Rice
    I welcome you all to another edition of Hive Learners creative Sunday, happy Sunday to you all and I wish us all a prosperous and productive week. Today I would be showing us how to prepare that smoky party jollof rice at home.
    Jollof rice is one of those dishes that can light up any gathering. When cooked well, it carries that irresistible smoky flavor that people usually describe as the “party taste.” Many people wonder how to achieve it, but I discovered a simple way in my kitchen that gave me the exact result I wanted. Let me share with you how I prepared my smoky party jollof rice step by step.
    ***INGREDIENTS USED***
    *Vegetable oil
    Pepper
    Tomatoes
    Bell pepper
    Onions
    Tomato paste
    Garlic
    Ginger
    Seasoning cubes*
    💓***STEP 1***
    *I began with my frying pan. Inside it, I placed fresh pepper, onions, tomatoes, bell pepper, bay leaf, ginger, a little vegetable oil, and garlic. I allowed the mixture to fry for some minutes. While frying, part of it got slightly burnt, and that was exactly the magic I needed. That burnt edge gave me the smoky flavor that makes party jollof unique. then I proceeded by blending the mixture into paste*
    💓***STEP 2***
    *In my cooking pot I added my vegetable oil and added the sliced onions, I allowed the onion to releases it juice in the oil then I fried the tomatoes paste, I allowed it to fry until the oil float on top of the paste that is when it is properly fried, I proceeded by adding the pepper mixture that I blended and fried it as well, I added my ingredients, the seasoning, jollof rice seasoning, salt to taste and fried so well*
    💓***STEP 3***
    *As it fried, I added my ingredients, seasoning cubes, jollof rice seasoning, and salt to taste. Onegod thing I love to do is to season my sauce very well and fry thoroughly so the flavor would come together nicely. After frying, I scooped out some of the sauce and kept it aside, that sauce would later be used after the rice had cooked, just to give it that final taste and flavor, some people would always add butter to it for that shinny look.*
    💓***STEP 4***
    *Next, I washed my rice, when cooking jollof rice it is not necessary for you to parboil it, I washed the rice with salt in other to get rid of excess starch in it, I washed more than five till the water remains clean without any form of starch in it and drained it in a strainer. Once drained, I poured the rice into the pot that still had the sauce and stirred it thoroughly before adding water, I love to use my wooden stick to do this, After stirring, I added water, making sure it was just enough to cook the rice without making it too soft. Jollof rice does not need too much water, so it is better to add gradually if needed.*
    💓***STEP 5***
    *I covered the pot and I allowed it to cook on low heat, jollof rice doesn't require much heat at all, it help absorb the sauce properly and it will not allow it to burn easily, some people love to cover the pot with foil paper so that no heat would escape but here I only cover it without anything.*
    💓***STEP 6***
    *When the rice cooked, I took the reserved sauce and poured it over the rice. I mixed it thoroughly so that every grain was coated with that rich, smoky sauce. After mixing, I added some sliced onions on top, covered the pot again, and allowed it to steam for a few more minutes.*
    💓By the time I opened the pot, the rice looked and smelled exactly like party jollof. The smoky flavor came through beautifully, and the grains were not soggy but firm and well coated. The extra sauce added at the end made it richer and more colorful.
    Thank you for taking your time to watch the video, i hope the video is helpful
    4 min
  • HOW TO MAKE PLANTAIN CHIPS AT HOME
    It is another wonderful Sunday and I'm glad to share my knowledge with my lovely family on hive, today I would be making plantain chips and this is one of the snack that is very common in my country.
    Plantain chips are one of those snacks I do not joke with, I love it so much that I prefer to pack it with me whenever I'm embarking on a journey, I love it so crispy and have a bit of sugar and that peppery flavor so today I decided to make tutorial on how we can make this at home, either to start a business with it or to enjoy with our family.
    **INGREDIENTS USED***
    💓*Unripe plantain
    💓Vegetable oil
    💓Sugar
    💓Onions
    💓Pepper
    💓Salt*
    💓The first thing I did was rinse the plantain properly. Even though the peel would be removed, it is always better to wash it first to get rid of any dirt. After rinsing, I peeled off the back and sliced the plantain into thin pieces with a slicer. The thinner the slices, the crispier they will be, so I made sure I cut them nicely.
    ![Screenshot_20250831-045030.jpg](https://files.peakd.com/file/peakd-hive/eunice9200/EogPmg17f4wk3im99KShHqjmQQTZzf3CcXaoFG8U49J6UvQmGMRkJ2b7VngCvRJeKQD.jpg)
    💓Next, I prepared the sugar. Instead of pouring raw sugar directly into the oil, I dissolved it in a little water and kept it aside. This makes it easier to add while frying and helps the sweetness spread evenly across the chips.
    💓After that, I blended pepper and onions together. This step is what makes my chips different from the regular plain ones. The combination of pepper and onions gives it a unique flavor, a mix of spiciness and aroma that makes every bite enjoyable.
    💓Once everything was ready, I poured enough cooking oil into a frying pan and allowed it to heat up for some minutes. Before adding the plantains, I sprinkled a little salt into the oil and mixed it thoroughly. It may sound unusual, but I noticed it gives the chips a balanced salty taste without overdoing it.
    💓I then added the sliced plantains bit by bit. I avoided pouring everything in at once because plantain slices can easily stick together. With my cooking spoon, I separated them gently as they fried. After a few seconds, I added the dissolved sugar and kept stirring to prevent them from clumping.
    💓The next step was to add the blended pepper and onions. I did this slowly and on low heat, because if the oil is too hot, the pepper can burn quickly. Adding it gradually allowed the flavor to soak into the plantains without spoiling their crunchiness.
    💓I fried until the plantains turned golden brown. That golden color is the clear sign that they are ready. I removed them from the oil and spread them out in a strainer to drain. After a few minutes of cooling, I had my crispy and tasty plantain chips ready.
    It is so easy to make, it doesn't take time, you can decide to skip the pepper part and if you are not a lover of sugar then you can skip the process, your plantain will still come out good and crispy. I hope this video and the procedure is helpful?
    3 min
  • How I Cook Ewedu Soup _ A Simple Yoruba Recipe
    I welcome you all to another episode of hivelearners creative Sunday, I wish you all a happy new month and prosperous week, today I would be taking you to my source because I'm preparing one of my favorite local soup which is ewedu which is also known as ***JUTE LEAVES***
    Ewedu soup is one of the Yoruba local soup. This soup is very popular among the Yoruba people in Nigeria. It is simple to prepare and goes well with amala, eba, fufu, it is majorly prepare for swallow just like our regular okro soup. I love to cook my own ewedu the way my mother taught me, though the whisking part may be stressful but it worth it, also I love using traditional ingredients like iru, potash, and a local broom called ijabe. If you’ve never made this soup before, don’t worry. Just follow my steps and you’ll get it right.
    ***INGREDIENTS USED***
    *💕Fresh ewedu leaves (jute leaves)
    💕Water
    💕A pinch of potash
    💕locust beans
    💕Salt
    💕Seasoning cube
    💕Ijabe (traditional broom whisk)*
    💓***STEP 1***
    The first thing you want to do is pick your ewedu leaves from the stem. It always comes with stem, so you have to remove the leaves from the thick stem and keep only the soft leaves. After picking, rinse the leaves well with clean water. I usually rinse it two or three times to remove any sand or dirt and slice it into small portions and leave it in my strainer to drain out excess water in it
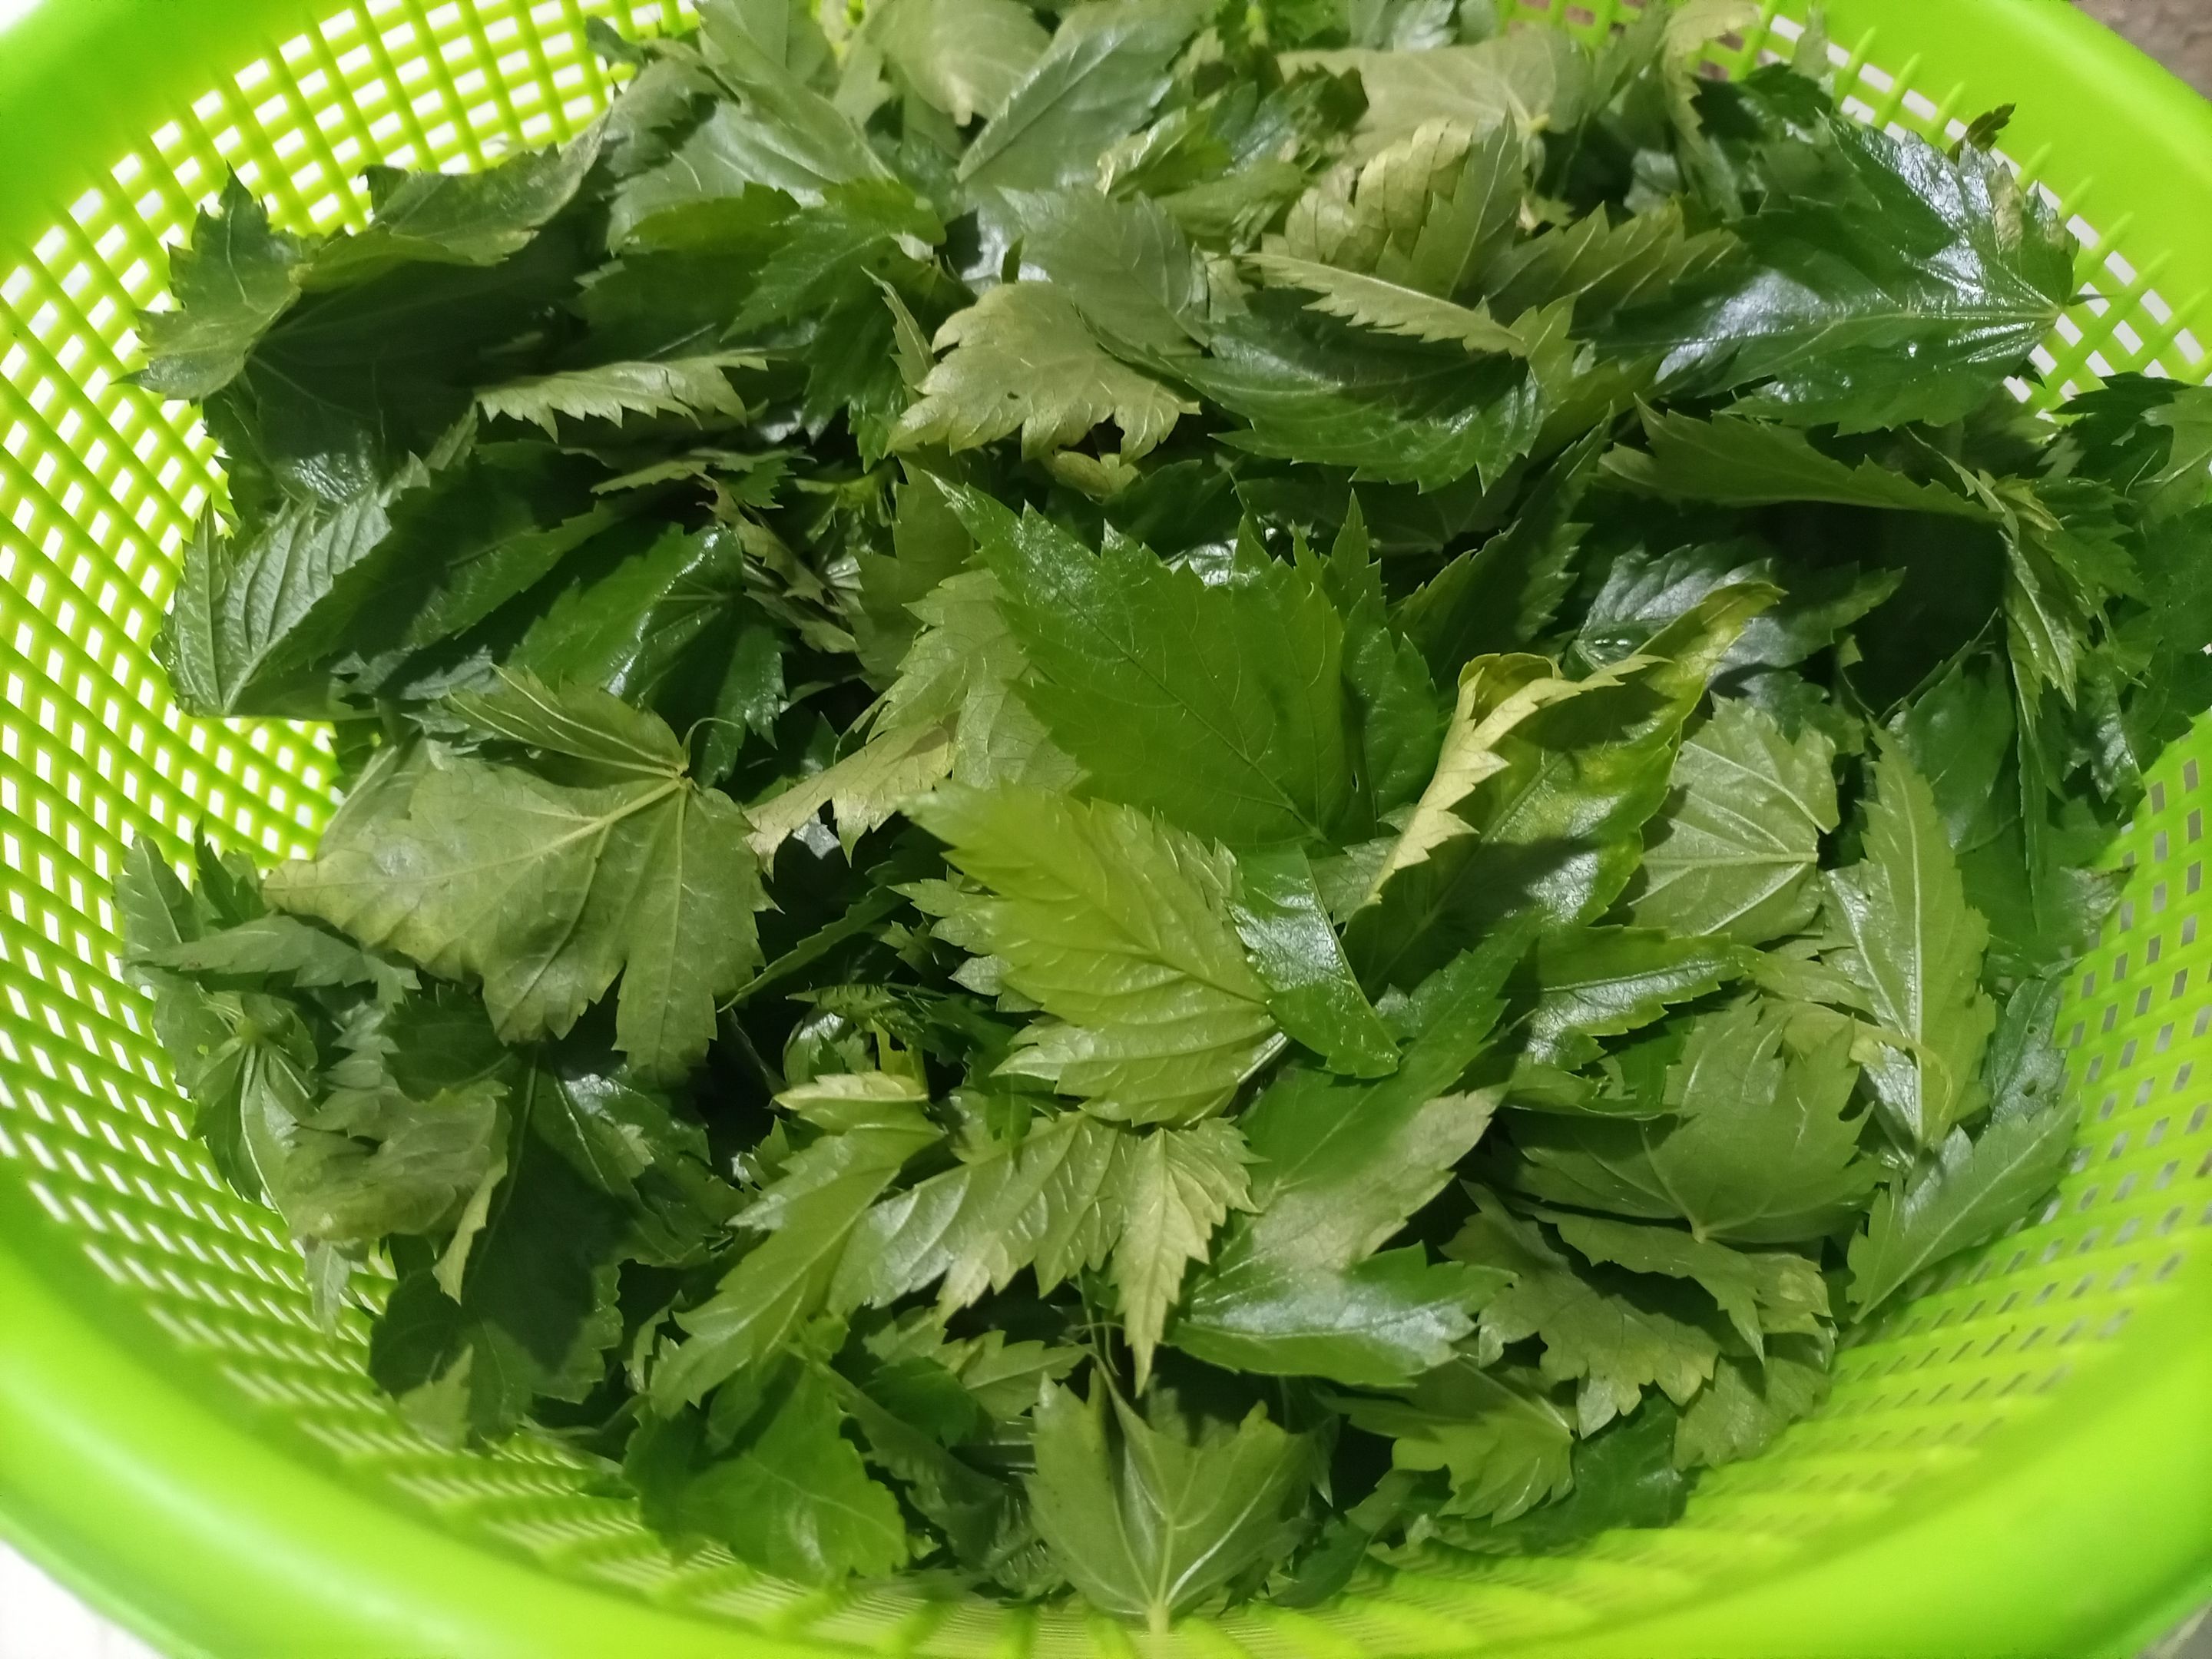
    ![IMG_20250630_144126_016.jpg](https://files.peakd.com/file/peakd-hive/eunice9200/EpC8ytwKgJQNsmdqhyBTvGrHq1DsiRhSx9YYcZnWXLvi9kFNw9SufV7ncWvyZYL3xpY.jpg)
    💓***STEP 2***
    I Put my pot on the gas and pour in some water. This leaves do not need too much water to cook, just little water because if the water is too much it won't bring out that slimmy texture, I added little water and allow it to boil, when the water starts to boil, I added the jute leaves with the little potash, I used my turning stick to break out small portion of the potash shown in the video, I didn't use everything, Potash helps to soften the leaves and bring out that stretchy, drawy texture we love in ewedu. Be careful not to add too much potash, just a pinch is enough.
    💓***STEP 3***
    After adding the potash and the jute leaves I let it cook for about 5–7 minutes. You’ll see the leaves becoming soft and the color turning darker. Don’t overcook it so you don’t lose the nutrients.
    💓***STEP 4***
    Now it’s time to use the traditional broom whisk called ijabe. This is the fun part, there is a broom design specifically for this soup, it is always a new broom and not the regular one we use at home, I removed the pot from the fire and start whisking the ewedu with the ijabe inside the pot. You will notice it becoming smoother and stretchy as you mash it. If you don’t have that broom you can use a blender to blend the leaves smoothly, but trust me, that broom gives it that local feel and taste.
    💓***STEP 5***
    After I'm done whisking and the soup is smooth, I put the pot back on low heat and added locust beans. I love adding locust beans because of the nice native smell and taste it gives the soup.
    I allow it to cook for another 2–3 minutes. At this point, I added a pinch of salt and half seasoning cube, but it’s not a must. Some people like it plain and simple, especially if they are serving it with rich stew and meat.
    💓***STEP 6***
    Your ewedu is ready. You can now Serve it with your stew and hot amala, eba, fufu, depending on what you have at home. In my house, we mostly eat it with amala and stew with meat or fish.
    Ewedu is not just a soup, it’s comfort food. It’s quick, easy, and full of health benefits. Jute leaves are rich in fiber, vitamins, and iron. So apart from enjoying the taste, you are also feeding your body with something good.
    ***Thanks for watching the video***

    3 min
  • HOW TO MAKE CANDLE LAMP AT HOME
    It is another wonderful Sunday, I welcome you all to another episode of Hivelearners Creative Sunday where creativity is appreciated.
    Today I would love to share something different, this is one of the things we can use at home, it is something simple to brighten up your space not too fancy, not too expensive. If you are in the mood to try something creative. This homemade candle lamp is the perfect idea.
    With just simple ingredients that we use daily at home, we can make a lovely little lamp that gives a calm and warm glow. It’s very easy to do, and you don’t need to go to the market to get anything special. Most of the items are things you already have at home.
    INGREDIENTS USED
    💓A small transparent glass cup
    💓4 to 5 tablespoons of rice
    💓1 cotton bud
    💓2 to 3 tablespoons of vegetable oil
    💓Water
    💓Matchstick or lighter.
    Step 1:
    Get your glass cup. Make sure it is clean and very dry, I used a glass cup because it is the one that is perfect for this candle, Get it ready and set it aside.
    Step 2:
    Now pour in the rice gently. The rice will go to the bottom and stay there. Add enough rice so it forms a small layer above the water. Always use dried rice not washed or parboiled rice.
    Step 3:
    Pour water into the cup. Fill it up above the rice.
    Step 4:
    Take one cotton bud, dip one side of the cotton bud inside the oil for a minute or more, this will help soak it very well and it will get the job done perfectly. The soaked side will be the part that lights up.
    Step 5:
    Push the dried part of the cotton bud into the rice. Let the soaked cotton part stand upright, slightly above the water level.
    Step 6:
    Carefully pour vegetable oil on top of the water. The oil will float above the water. Make sure the oil soaks into the cotton.
    Step 7:
    Now light the cotton part with a matchstick or lighter. Be patient. It may take a few seconds to catch fire. And You’re Done
    Your candle lamp is ready. It gives off a soft, steady light. You can add more oil later to make it last longer. It is very easy to make and if you want to add any fragrance to give it a refreshing smell then you can do that, You can add any fragrance of your choice and this will make your room smell nice and adorable but in my tutorial, I didn't add any scent at all.
    I hope this video is helpful, Also I appreciate you all for stopping by and commenting on my blog.
    2 min
  • My Step-by-Step Cowskin Sauce Recipe
    It is another great day to be here, hello my people, I welcome you to my blog and another episode of hivelearners creative Sunday, where creativity is been appreciated. Today I would love to show us another way in which we can enjoy our grains.
    There are lots of ways we can enjoy our grains, be it rice, macaroni, or spaghetti. It should not always be one way of preparing it. That old method, same old stew and same old taste, can make some people lose interest in food. That’s why I always try to switch things up once in a while and that was how this my Cowskin sauce came to life.
    This are the list of the ingredients I used.
    Cowskin
    Pepper
    Tomato
    Onions
    Salt
    Curry powder and thyme
    Vegetable oil.
    First, I washed the Cowskin, (it is also known as ponmo in my area) thoroughly. You know Cowskin always hides dirt, especially those ones from the market. I scrubbed it well with sponge. After washing, I diced it into smaller sizes because that is how I love to enjoy it.
    Then I put it on fire and parboiled for like two minutes. I added a pinch of salt to help clean it more. After parboiling, I poured it into my sieve and rinsed it again with cold water.
    One thing I did that helps this Cowskin come out so tasty is marinating. I added one seasoning cube, curry powder, thyme, and salt. I mixed it well with my hands so the taste can enter inside properly. After that, I kept it aside.
    Then I prepared the other ingredients blended pepper, tomato, and onions. I also diced some onions separately and kept that aside for later. I like using both blended and diced onions in my cooking.
    In a frying pan, I added a little vegetable oil and allowed it to heat. Then I poured in the diced onions. I waited for the onions to release their sweet smell into the oil before pouring in the blended pepper mixture. I allowed it to fry for some minutes.
    After the pepper had fried for a while, I added the marinated ponmo into it. I turned it well so that everything can mix together. After a few minutes of frying together, I tasted it and added just a little salt, because of the one I already used earlier in marinating the Cowskin.
    As I was frying, I noticed oil had started floating on top of the sauce. That was the sign I needed that the sauce was ready. Then I added two cooked eggs. The egg is optional, I just love egg in my meal especially when I'm eating rice.
    Lastly, I garnished the sauce with the remaining diced onions I kept earlier. It added that fresh and crunchy feeling to it. This sauce came out really nice and I enjoyed it with rice. You can also try it with yam, bread, or even macaroni. It’s something different from the usual stew.
    Thank you all for watching this video, I hope it is helpful?
    3 min
  • My Easy Way to Prepare Nigerian Okra Soup
    Okra soup is one of the lovely Nigerian soups you can enjoy with any swallow of your choice, it is one of my best soups because it is very easy to prepare and very affordable. I love the way it draws and the beautiful green color of the ugwu leaves. Just recently, I decided to make okra soup at home, and I want to share how I did it, step by step.
    Ingredients used
    Fresh okra
    Cowskin
    Smoked fish
    Locust beans
    Ugwu leaves
    Pepper
    Salt
    Palm oil
    Seasoning cubes.
    STEP 1:- The first thing I love to do before cooking is hygiene, clean my hands, and also get all my ingredients ready. I washed the okra properly and chopped it into small pieces, I used a chopper for this okra, you can use a knife to cut the okra it depends on your choice.
    I like my okra finely chopped because it helps the soup draw well. After that, I washed the cow skin thoroughly to make sure there was no sand or dirt left. I also deboned the smoked fish carefully. I washed and sliced the ugwu and set it aside. Then I blended my fresh pepper with a little water. I brought out my locust beans, seasoning cube, and salt so that everything would be close by when cooking.
    Step 2:- I placed my clean pot on the gas and poured in some water. Not too much, because I wanted the soup to be thick, not watery. After that, I added palm oil to the water. I allowed the oil and water to boil a little.
    Step 3:- When the water and oil mixture boiled well, I poured in my blended pepper and stirred with my cooking spoon. After that, I added my deboned smoked fish and cow skin. I stirred everything together gently. Then I dropped one seasoning cube into the pot and a little salt to taste. I also added some locust beans to make the flavor stronger.
    Step 4:- Next, I added my chopped okra into the pot. I stirred the mixture very well so that everything blended together nicely. After stirring the okra for some minutes, I added the fried fish I had prepared earlier. This gave the soup more taste. Then I sprinkled my sliced ugwu leaves on top to give the soup a fresh and healthy look. I stirred gently and allowed it to simmer for a minute.
    Now the soup is ready and you can pair it with any swallow of your choice.
    2 min
  • HOW TO MAKE BODY SCRUB AT HOME
    I welcome you all to the month of June, it's another episode of Creative Sunday where creativity is been appreciated, today I am not doing much I would love to take us on a process of how to make a body scrub at home.
    A body scrub is something you use to clean and smooth your skin. It has small, rough pieces like sugar or salt that help remove dead skin. When you rub it on your body, it helps the skin to glow, fresh, and clean. And also allows creams or oils to work better. This is mainly used by the ladies
    As a lady you do not need to break the bank before taking good care of yourself, there are things we can use to pop out our beauty and that is why I'm here to share some of the tips with us by using simple kitchen ingredients. You don’t need to buy expensive products. With just sugar, honey, lemon, turmeric, and coffee, you can create a powerful scrub that works wonders on the skin.
    INGREDIENTS USED
    *2 tablespoon of sugar
    2 tablespoon of honey
    1 lemon
    ½ teaspoon of turmeric
    1 tablespoon of coffee*
    Step 1
    Get your clean bowl and spoon ready.
    Step 2
    Pour 2 and half tablespoons of sugar into the bowl. Sugar helps scrub off dead skin and dirt from your body. It makes your skin feel smooth after washing.
    ![IMG_20250507_090846_909.jpg](https://files.peakd.com/file/peakd-hive/eunice9200/EpEJjTwJYNJUzxu1dy1qjESi6ozFUh9JN6tHVVDK6uact63c1SrVNDgLKSm72cAEZAb.jpg)
    ***SUGAR***
    Step 3
    Add 1 tablespoon of ground coffee to the sugar. Coffee helps to make the skin firm and bright. It also helps with blood flow under the skin.
    ![IMG_20250507_090956_464.jpg](https://files.peakd.com/file/peakd-hive/eunice9200/EptcPVpeMbXLtYprxcDVKhctQ3KqUDjtN1MMu32KvPiir6fPtJbzFb1b7jodJDL4hF4.jpg)
    ***COFFEE***
    Step 4
    Add ½ teaspoon of turmeric. Be careful not to add too much because it can stain. Turmeric is good for the body it is healthy it helps to clear spots and makes the skin glow.
    ![IMG_20250507_090923_122.jpg](https://files.peakd.com/file/peakd-hive/eunice9200/Ep3fqHgYoYC3aCjJSHWN83jbF4KX8fahsTABLiz5vVFowH1YadJzFufRV2o27wdcLUY.jpg)
    ***TUMERIC***
    Step 5
    I used one lemon for this mixture and squeezed the juice into the bowl. Lemon helps to clean the skin, remove oil, and brighten dark areas.
    ![IMG_20250507_091002_485.jpg](https://files.peakd.com/file/peakd-hive/eunice9200/EqWmo5rtErV24oPtpmTktUJHicqdQdZjSum97BijpG7HWikRezqhYig3Cxbkj4cHbgv.jpg)
    ***LEMON***
    Step 6
    I Added 2 tablespoon of honey. Honey keeps the skin soft and smooth. It also helps to fight pimples and rashes.
    ![IMG_20250507_090820_232.jpg](https://files.peakd.com/file/peakd-hive/eunice9200/Ep1YLKMhpFu2xcNUTTAfVE3rAn6EygpqGTxDwG1Q7U18vaJsmLkohiTBwnxemskeHJK.jpg)
    ***HONEY***
    This scrub can be used on the body, especially your knees, elbows, and feet. Wet your skin with water first. Then gently rub the scrub in circles for a few minutes before rinsing off. Use it twice a week for best results.
    I hope this is helpful, you can also watch the video to see the steps clearly, thanks for your support.
    3 min
  • How To Prepare Ewa Agoyin
    It is another wonderful Sunday and a happy new week, also I welcome you to my blog, today is all about a creative Sunday where crafts and talents are appreciated.
    If you are a Nigerian and staying in the South-western part of the country then you will know more about this delicacy I'm about to show us.
    Growing up, I was that child who always ran from beans. I didn’t like the smell or the way it looked on the plate. But anytime my mother prepared it the Ewa Agoyin way, I found myself licking my fingers and asking for more. There was just something about the spicy sauce and the soft, mashed beans that made it irresistible. Now, as an adult, this recipe has become one of my favorite ways to cook and enjoy beans.
    Ewa Agoyin is not just for street food lovers. It’s for anyone looking to try something flavorful, different, and rich in taste. It’s also a great way to give beans a new twist especially if you or someone in your home doesn’t enjoy the usual style. This version might surprise you.
    ***INGREDIENTS USED***
    FOR THE BEANS:
    3 cups of honey beans
    Water
    Salt to taste
    Onions
    FOR THE SAUCE:
    Fresh pepper and tomatoes
    One big onions
    Palm oil
    Panla fish
    Ponmo (cow skin)
    Seasoning cube
    Salt
    **Step 1: Parboil and Cook the Beans**
    I always start by parboiling my beans for 15 minutes. Then I pour it into a sieve, rinse it under running water, and return it to the pot with clean water then add salt and onions and close to cook. This reduces the amount of fertilizer used in planting it and gives it a fresher taste. I cooked the beans until they were very soft and almost mushy, That softness is what makes Ewa Agoyin stand out.
    This is just another way to cook your beans, and honestly, it can help you enjoy it even if you normally don’t.
    **Step 2: Preparing my Ingredients**
    I blend the fresh pepper and tomatoes together. You can chop it roughly or smooth, it all depends on what you want, I did mine roughly but not too much, it is neither smooth or rough.
    **Step 3: Make the Sauce**
    I heat palm oil in a pot for about one minute, with no bleaching. Then I add sliced onions and stir for another minute. After that, I add the panla fish and ponmo, letting them fry gently in the oil for a few minutes so the flavor builds.
    Next, I pour in the blended pepper and tomato mix. I reduce the heat and let it fry slowly. This is the part that takes patience. I keep stirring until the oil begins to float and the sauce thickens well. I then add a seasoning cube and salt to taste and everything blends.
    **Step 4: Serve and Enjoy**
    Once the beans are soft, I mash them slightly with a spoon. Then I pour that peppery, flavorful sauce over it. Bread or fried plantain on the side takes it to the next level. Ewa Agoyin might just be the recipe that makes you fall in love with beans all over again.
    4 min
  • Easy Nigerian Egusi Soup Recipe You Can Try
    I welcome you all to another edition of Creative Sunday, I wish us all a prosperous and productive week, today I will be showing us how I prepare one of the Nigerian delicacies.
    Egusi soup is one of Nigeria’s most loved soups. It’s delicious and perfect with any swallow of your choice it can be eba, pounded yam, or semo. I made egusi soup using simple ingredients I had at home. I even blended my melon seeds myself. Let me share the step-by-step method.
    ***INGREDIENTS USED***
    *💓2 cups of melon seeds
    💓Fresh ugwu leaves
    💓Smoked fish
    💓soft cowskin
    💓Locust beans
    💓Peppers
    💓1 medium onion
    💓Palm oil
    💓Salt
    💓Seasoning cubes*
    ***PREPARE YOUR INGREDIENTS***
    First, I picked my melon seeds and blended them using my blender until smooth. If you are doing this at home too, make sure your blender is dry before you pour in the seeds. After blending, I set the melon aside.
    ![BeautyPlus_20250504083324174_org_1.jpg](https://files.peakd.com/file/peakd-hive/eunice9200/AKLt5SvUjsW7yWwa6f68EigneNmhxa96caWfKSJFszQxbiA1buLNWFejhMstUyc.jpg)
    I washed the smoked fish carefully to remove any hidden sand and deboned them gently. I also washed the cowskin and diced it into small, chewable pieces. Then I rinsed the ugwu leaves properly and set them aside. Next, I blended the fresh peppers and onion together. I didn’t make it too smooth because I like seeing tiny bits of pepper in the soup.
    ***START THE COOKING***
    On a small plate, I mixed the blended melon with a little water and salt to form a thick paste. I placed my pot on the cooking stove and added palm oil. I allowed it to heat up slightly, just warm, not bleached.
    After that, I used a spoon and gently dropped the egusi paste into the pot in small lumps. I didn’t stir immediately. I covered the pot and allowed it to cook on low heat for about five minutes. This method helps the egusi to form little clumps inside the soup. After five minutes, I opened the pot and gave it a gentle stir. I added a little water to loosen the soup because egusi thickens very fast.
    ***ADD THE BLENDED PEPPER***
    After frying the melon for some minutes, then I added the pepper and cover to cook for another minute before introducing other ingredients to it, after some minutes of cooking, I added the locust beans and stirred well. Then I introduced the smoked fish and diced cowskin into the pot. I stirred everything together and allowed it to cook for another five minutes so that the fish and kpomo could absorb the flavor. I also added my seasoning cubes and a little salt at this point, stirring everything nicely.
    ***FINAL TOUCH WITH UGWU***
    Finally, I added the shredded ugwu leaves. I stirred them in and allowed the soup to simmer for just a minute on low heat. Ugwu cooks quickly and helps the soup stay fresh and green.
    My egusi soup was ready, It was thick, rich, and full of smoky, delicious flavor. The soup came out so tasty. I enjoyed it with hot semo, and it was a perfect meal. I hope this video is helpful
    3 min
  • How I Made 30 Litres of Liquid Soap at Home
    I welcome you all to another episode of Creative Sunday, I wish us all a prosperous week and a happy Easter to all my Christian brethren.
    In this post, I want to share how I made 30 liters of liquid soap from scratch. I hope it helps someone who wants to try something new, start a small business, or just cut costs at home.
    Some months ago, I was looking for a simple way to save money and also learn a useful skill. That was when my friend suggested that I try making liquid soap at home. At first, I was scared. I thought it would be too hard, but to my surprise, it was easier than I expected. The chemicals are very affordable to get and not stressful, so I went to the market and bought all the chemicals and made them, have little idea about them some years back because my sister did them once and since then I haven't come across them.
    So these are the chemicals I used in making liquid soap
    ***HERE ARE THE CHEMICALS I USED:***
    1. Nitrosol
    2. Caustic Soda, Soda Ash and STPP
    3. Sulphonic Acid and Texapon
    4. SLS
    5. Bleach
    6. Glycerin
    7. Colour
    8. Water
    ![Screenshot_20250420-073208_1.jpg](https://files.peakd.com/file/peakd-hive/eunice9200/23wqti1RkLyveudK1EkbYuCyVZ3K2RyEY1ZDXMreXo51n4Hrznew5QtnZyVgqim495ruA.jpg)
    Before I started, I got all my tools ready buckets, a long wooden stick for turning, hand gloves, and nose mask. Safety first because some of the chemicals are very harsh to the body.
    The first step is to dissolve all the chemicals you will be using in different bowls and set them aside, without dissolving the chemicals there is nothing we can do because it will not bring out the perfect thing we want so dissolving is very necessary.
    First, I poured 10 liters of clean water into a big bucket and added the nitrosol. I stirred it very well until it became thick. That was the base of my soap.
    After that, I dissolved the caustic soda, soda ash, and STPP in the same bowl which is number 2 in my video, after leaving it for about 30 minutes then I added it to the nitrisol and continued stirring for some minutes. At this point, the mixture was still watery, but I could already see changes.
    Then I poured in the dissolved sulphonic acid and Texapon then stirred. It started to look more like soap. I mixed it thoroughly. This is what gives the soap its foamy look. Also, the SLS was not left out, I added it to it and gave it a good stir.
    I mixed my color with a little water in a small bowl and added it. I also added perfume to give the soap a sweet smell. After adding everything, I poured the remaining water little by little until the full 30 liters was complete. I kept turning it for about 10 more minutes. When I was done, I covered the bucket and left it for some hours for it to be settled.
    Making liquid soap at home has helped me save money, it is so simple to make Just follow these steps, also the measurements were given to me by the seller, they already know the perfect measurements of chemicals that would be enough for 30 liters worth of liquid soap, I am not the one who give the measurements.
    I hope this tutorial will be helpful for anyone ready to try it out, thank you all for supporting this blog
    4 min

About eunice9200 3Speak Podcast

From the publisher's feed

Listen and watch the latest videos from eunice9200. Hosted by 3Speak.tv, the free speech video platform.