
Sign up to save your podcasts
Or



Ever wonder where your head actually is during a side plank, an aerial move, or even a basic lift? This quick tutorial guides you through a simple yet powerful sequence to help you feel and sense your head’s position in space—a skill that can transform everything from acrobatics to everyday strength training.
In this session, I’ll take you through three phases:
Phase 1: Awareness Building – Using gentle hand placements and specific head movements to tune into the relationship between your collarbone, neck, and head position. This foundational work creates the sensory map you’ll use throughout the rest of the practice.
Phase 2: Static Hold – A side plank variation where you apply your new awareness. You’ll explore different leg positions (knees bent, staggered, or stacked) while maintaining conscious attention to where your head sits in space.
Phase 3: Dynamic Movement – A rolling exercise from back to forearm and knee that lets you track how your head moves and positions itself through transitions. This is where the real integration happens.
This kind of proprioceptive work is especially valuable if you’re doing anything acrobatic, aerial, or simply trying to optimize your form in weightlifting movements. When you know where your head is, the rest of your body can organize itself more efficiently around that awareness.
The techniques in this tutorial can be applied across countless movement contexts. Give it a try and notice what shifts for you.
If you found this helpful, please like, share, and subscribe to support more movement education content.
I’m going to let you in on something: there’s often a missing piece in core work that completely changes how effective it is—the coordination between breath, ribs, and movement.
This exercise changes that.
The Setup
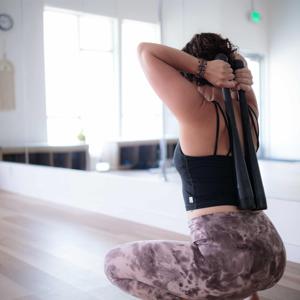
You’ll need something stable you can hold onto and pull against—stall bars (like I use), a pull-up bar, a sturdy beam, or even a heavy piece of furniture that won’t move. The key is having something fixed that allows you to create tension with your upper body.
Why This Works
Here’s what makes this exercise different: you’re using your hands to anchor your ribcage. By pulling the bar toward your feet with your elbows pointing toward the ceiling, you create a reciprocal action that settles your ribs toward the ground. This anchoring is everything—it’s what allows your core to work the way it’s designed to.
From there, you roll up and down, either with knees tucked or legs extended. The magic isn’t in the leg position, though. It’s in maintaining that ribcage connection throughout the movement.
The Common Mistake
When people extend their legs in core exercises, there’s a tendency to brace—to push the belly forward and create tension in all the wrong places. What you want instead is for your belly to continue reaching toward your spine, staying taut but not puffed out. It’s a subtle but crucial difference that changes everything about how the exercise feels and what it develops.
Start Simple, Progress Mindfully
Begin with the tucked position. It’s powerful and it gives you the clearest sense of what it feels like to truly round down through your spine with control. Once you’ve mastered that coordination, experiment with extending your legs. But remember: if you find yourself bracing, come back to the tuck. There’s no prize for doing the harder variation poorly.
This is one of those exercises that rewards patience and attention. Give it a try.
Watch the full demonstration in the video above.
Sometimes the simplest movements create the deepest shifts. This 7-minute core flow sequence isn’t about crunches or planks—it’s about reconnecting with the powerful relationship between your breath and your body’s center.
When we think about core work, we often jump straight to strength and stability. But there’s something that comes before all of that: awareness. How does your breath move through your torso? How does your center organize itself in space? These aren’t abstract questions—they’re felt experiences that change everything about how you move.
What Makes This Practice Different
This sequence guides you through a series of simple movements designed to help you sense how breath initiates movement from your core. You’ll start standing, then move to the floor, exploring different positions that highlight the connection between breathing and the natural expansion and contraction of your body.
The practice includes:
* Standing breath work with gentle squatting movements
* Floor-based positions that isolate different parts of your ribcage
* A finishing breathing pattern designed to calm your nervous system
Why This Matters
Your core isn’t just muscle—it’s the integration point for your entire body. When you can feel how your diaphragm moves with each breath, how your ribs expand and contract, how your pelvis responds, you’re tapping into your body’s natural intelligence. This kind of awareness translates into better movement patterns, less tension, and a deeper sense of embodiment in everything you do.
Give yourself these seven minutes. Your body will thank you.
Ready to practice? Watch the full video above and move with me.
We spend most of our lives on our feet, yet how often do we actually feel them?
Today’s practice is about reconnecting with the ground beneath you—literally. In just five minutes, you’ll slow down and pay attention to something most of us ignore: the sensation of our feet against the floor.
The practice starts with a simple visualization. Imagine the floor is wet sand. What would your footprints look like? This mental image helps you notice how you’re actually standing—where you’re holding tension, where you’re leaning, where you’ve lost contact with the ground.
From there, you’ll move through gentle, deliberate movements: lifting and pressing your heels, widening and narrowing your stance, stepping forward and back with full awareness. Nothing flashy. Just you and your feet, having a conversation with the ground.
When we talk about feeling “grounded,” we usually mean it metaphorically—centered, stable, present. But this practice makes it literal. By bringing your attention down to your feet, you create an anchor point for your entire nervous system.
At the end, you’ll return to that wet sand visualization. What do your footprints look like now? Most people notice a difference—a sense of being more evenly distributed, more settled, more here.
That’s the gift of grounding: it brings you back to yourself, one footprint at a time.
Today’s practice is about circles—those perfect, continuous shapes we see everywhere but rarely embody.
This short movement sequence (about 5 minutes) guides you through circular motions from your knees to your nose, teaching you to isolate movement, find what feels good, and notice what doesn’t.
What I love about this practice:
* It’s incredibly gentle and accessible
* You can do it anywhere, anytime
* It reveals tension patterns you might not know you’re holding
* There’s something meditative about tracing the same shape through different parts of your body
The setup is simple: Find something circular or curved in your room. Look at it. Then spend a few minutes making circles with your body. At the end, look at that object again and notice if your perception has shifted.
It’s a beautiful reminder that movement changes not just how we feel, but how we see.
What circular object did you choose? I’d love to know what caught your eye.
The squat is one of the most common movements we train—and one of the most over-policed.
We’re often told exactly how it should look: where the feet go, what the knees should do, how the spine should behave. Those details can matter in certain contexts. But they’re not the whole story.
In today’s short exploration, I invite you to step away from how a squat is supposed to look and instead get curious about what happens when you play with the movement.
You’ll move through a few simple variations:
* pausing in the bottom of the squat
* letting the arms travel through space
* imagining different shapes in front of you and allowing your spine to respond
There’s no single right way to do this. The goal isn’t to find a better shape—it’s to notice how your weight shifts, how your feet relate to the floor, and how movement travels through your body when you give it a little freedom.
Understanding specific shapes is useful when you need them—like lifting something heavy. But much of life asks us to move in ways that are less rigid and more adaptable.
This kind of exploration is about the journey, not the endpoint.
Try the video, then take a moment afterward to notice what changed—if anything. And if something surprised you, that’s usually a good place to stay curious a little longer.
As always, I’d love to hear what you noticed.If you’d like a simple, repeatable way to build strength without overthinking form, you can download the Simple Strength Training Template here.
This short practice is a spinal intelligence brain-mapping exercise—not about fixing anything, but about noticing.
You begin by gently shifting weight through the pelvis. Then you widen the lens:How does the spine respond?What do the arms do when you let them participate—or rest?What changes when the head leads, rather than follows?
Finally, you pause.You imagine the pelvis.You imagine the head.And then you sense the space in between.
These kinds of practices help clarify how your body organizes itself—without effort, without forcing, without needing to get it “right.”
If you try this, move slowly. Let sensation lead.And if anything interesting shows up, I’d love to hear about it.This is a seated practice you can return to anytime you want to reconnect with how your spine organizes itself.
This quick tutorial is a gentle exploration designed to create more ease through the hips, low back, and pelvic floor—without forcing depth or pushing range of motion.
Beginning in a wide-legged position, the focus is on sensing rather than stretching. First, you take time to locate the tailbone, then the pubic bone, allowing each to move just enough to become familiar. From there, the movement becomes quieter: imagining the tailbone and pubic bone drawing toward one another as you lower, and letting the breath fill the space between them.
The addition of a small foot rotation introduces another layer of information. Changing the position of the leg subtly shifts how the pelvis organizes itself and how the breath is received. Pausing for a few breaths allows the nervous system to catch up, often creating a sense of lift, support, and space rather than collapse or strain.
This is a useful practice if you’re feeling stiff through the hips or pelvis, or if deeper stretches tend to feel overwhelming. Move slowly, prioritize what you’re sensing over how it looks, and let this be an exploration of ease rather than effort.
(Video above. No equipment needed—just space to move and breathe.)
This short seated flexibility flow is designed to create a greater sense of ease through the hips, low back, and pelvic floor—without forcing a stretch or pushing for range of motion.
Beginning in a seated position, the movement explores how rocking in front of and behind the sitting bones changes the way the pelvis organizes itself. As the tailbone travels—first between the legs, then reaching back behind you—the pelvis, spine, and breath begin to coordinate in a way that often feels surprisingly relieving.
Lifting the hips, returning to seated, and adding simple arm reaches introduces a subtle sense of flow. Rather than isolating a muscle or chasing flexibility, this sequence invites the whole system to participate. Breathing into the space between the pubic bone and tailbone adds another layer of awareness, helping the movement feel supported rather than effortful.
This is a useful exploration if you’re feeling stiff through the hips or low back, or if traditional stretching tends to leave you feeling more tense than relaxed. Move slowly, follow the sensations you’re noticing, and let this be an inquiry into how flexibility can emerge from coordination and ease rather than force.
(No equipment needed—just a little floor space and time to explore.)
This short movement exploration focuses on creating gentle motion through the pelvis and pelvic floor using a tall split stance and a simple weight shift.
As the arms reach forward and up, the pelvis is invited to respond—not by forcing a stretch, but by allowing the tailbone to travel and organize itself in relation to the legs. Adding the side bend and a couple of easy breaths offers another layer of sensation, helping you notice how breath, balance, and pelvic movement influence one another.
This is the kind of practice that can look very simple on the outside, but feel surprisingly informative on the inside. Pay attention to how your weight shifts, how your pelvis responds, and whether one side feels different than the other.
Move slowly, stay curious, and let this be an exploration rather than something to “get right.”
From the publisher's feed