
Sign up to save your podcasts
Or



At this station you can see a mock-up fire hydrant riser, demonstrating the basic connection detail between services and timber elements namely, screws. As you will see throughout this floor, all services can be roughed in and connect to the structure with the use of nothing more than screws and a battery powered driver.
Before stepping through this doorway, have a look at how this has been cut out of the timber. For core walls, it is standard practice for the fabricator to cut most of the door penetration, leaving an un-cut area in each corner. This prevents unnecessary exposure to live edges until the door way is needed, at which point it can be cut out on site. Indeed, you can see this has occurred here, with smooth cuts to most of the door frame, and circular saw cuts at the corners.
At this station you can see a small display of screws typically used to connect massive timber structures together. When designing timber structures it is important to note that screws are sometimes able to perform the same function as an angle bracket, minimising the visual impact of the connection. Note that while the longest screw here is 300mm long, certain designs can call for screws that are much longer than this. While there are several suppliers of mass timber screws and bracketry, this structure demonstrates some of the range from Rothoblaas. The CLT in this structure has been sourced from XLam Australia. Take a minute to look at the central “spine wall”. Here you can see three layers of sawn timber, each of which has been oriented perpendicular to the last, glued, and pressed into a panel. It is important to note that CLT typically comprises an odd number of layers, so the two external layers span in the same direction. As you can see here, it is standard for external layers to run in the direction of the primary span or load. Here the primary load is vertical, and as such all panels have been designed so the external lamella run vertically. As with other engineered timber products, CLT reduces the impact of knots and other impurities, delivering a whole that is stronger and more robust than the sum of its parts.
Before moving on to the next station, notice how loads are transferred from the landings to the core walls through the use of an angle plate. While a timber plate would also be effective in this circumstance, the combination of materials here gives an aesthetically appealing finish.
Continue up the next half flight of stairs for the next station.
Welcome to the structural core of the building. This has been designed as a stair core, but could just as easily be a lift core or services rise as need be. The core of the project typically provides lateral stiffness, transferring shear and overturning loads to the ground. To accommodate these significant loads cores are typically built out of massive timber elements or heavily braced frames. At this level you can see the core structure comprises massive CLT panels. If you’re unfamiliar with CLT make sure to have a listen to the “definitions” track in this audio guide.
Here we have purposefully kept finishes to a minimum so you can see all of the connections between the elements. You can see how the CLT has been perfectly cut to size in a CNC machine, and how these significant structural elements are held together with advanced, high capacity screws and connectors. A unique feature of CLT construction, the CLT stair flights here re also completely pre-fabricated. These flights are produced as a thick panel, with treads then cut out with the CNC. Any off cuts of this process can then be recycled.
You might wonder why the walls here are covered in plasterboard. In fact while fire risk is considered to be reduced within cores, compliance with the Deemed to Satisfy requirements in the NCC calls for a single layer of 13mm fire rated plasterboard to be applied to the inside walls of the massive timber core, and any soffit above the ground floor.
For the next station walk up this first half flight of stairs.
This room has been finished to the standard one may expect in a completed project – the only un-finished work here is in the power point which has purposefully been left out to show the fire box behind it – a requirement when penetrating a fire rated element.
In this room you can find some samples of the products you can see throughout the structure. Take this opportunity to touch and feel them – pick them up and see how heavy they are. With these simple elements you can build a large project, often only requiring battery powered hand tools during the structure stage. Timber construction sites typically require no hot works, wet trades, or other slow or high-risk trades. Timber construction has been proven to be faster, safer, and of a higher quality than experienced with traditional materials. Beyond this, depending on the design and other project parameters, timber projects are typically cost competitive with concrete and steel.
You may also notice the sprinkler head above you – it is now a requirement under the NCC that all projects over 4 storeys are serviced by fire sprinklers, regardless of the building material used.
The next station of this tour is in the stair well – we’ll meet you there!
This last section of external area demonstrates a number of systems. At ground floor level you can observe another rainscreen façade system, this time in the form of a lightweight brick finish. As with all previous façade systems, this display features the rainscreen, ventilated cavity, vapour permeable membrane, fire protective plasterboard, and finally timber structure and non-combustible insulation. Of particular interest at this level is the façade finish, the Corium system available from PGH Bricks. This system allows for the prefabrication of brick façades on a panel housed in a safe, weather protected warehouse environment, which can then be delivered to site, installed, and joints “stitched” with remaining bricks. While there are several prefabricated brick façade systems available for use with timber, the specific product seen here is structurally robust, and is suitable for use up to 30 storeys.
Immediately above this brick finish we can see a full fill solid timber cavity barrier. Note that this would normally be covered by the façade cladding, but we have chosen to reveal it here of display purposes only. This performs the same function as all other cavity barriers identified however as a “full fill” barrier this requires no heat to activate – it fully fills the cavity in its natural state. With this in mind, it is important to note that full fill cavity barriers in facades must be flashed, and any moisture within the cavity must be able to drain out over the barrier. Again, cavity barriers are not required in all designs, so make sure to talk to your fire engineer or building surveyor about what is and isn’t required.
Above this cavity barrier you can see the external side of a solid balustrade featuring the James Hardie ExoTec system. This will be discussed further once we reach that station upstairs. The next station on this audio guide is located within the finished room on the ground floor of the structure – walk around there when you’re ready to continue the tour.
The right-hand half of this main façade features the ExoTec rain screen system produced by James Hardie, supported by James Hardie’s proprietary top hat sections. If you are starting this audio guide at this station, welcome, we recommend that you first watch the introductory video on the screen in the ground floor, and then commence your tour at station 1.
Now, back to the guide: In this area you can see several now familiar products and systems. Again there is the rainscreen façade, the ventilated cavity, a vapour permeable membrane, two layers of fire and water rated plasterboard, ply bracing, and finally the stud frame structure complete with non-combustible insulation. As elsewhere you can see a tension connector on the corner of the panel, and a shear connector toward the middle of the panel. Again, the structure here is designed to transfer the loads of a seven-storey structure, and as such we can see triple LVL studs, and a high strength F17 bottom plate.
A new feature of interest here is the tie down rod supplied by Simpson Strongtie. Typically used to resist the overturning forces applied by wind loads, this threaded rod is coupled at each floor, essentially delivering a single long steel cord to resist tension forces. This element is not required in all projects, by an engineer may elect to specify its use in particularly windy climates. For example, these rods are commonly seen in low to mid rise structures in tropical Queensland. Make sure to keep an eye out for this rod as we move up the structure.
Back to the main structure, the front façade features two main finishes. On the left hand side we have an Equitone finish, a pre-finished rain screen panel, which has been installed on the Nvelope system. Under this façade, you can see the system identified in stations 2 and 4 comprising a vapour permeable membrane, fire and water rated plasterboard, bracing as required, and finally the main structural element. Here, this loadbearing structure consist triple studs of LVL, with groups spaced at 450mm centres. With LVL studs typically achieving a compressive strength of between 47 and 51 MPa, it is clear that once they are nail laminated together in threes, each group becomes a mini-column. Keep in mind that this wall panel has been designed for the loads of a seven-storey structure, and as such this high loadbearing capability is necessary.
Indeed, these high loads are the reason why the wall’s top and bottom plates are a different colour to the studs. While rough sawn timber exhibits impressive structural capacity when loaded parallel to its length, when loaded in the tangential direction (as occurs with a top or bottom plate) lower strength graded timber is susceptible to crushing when heavily loaded. While this results in very little movement on a floor by floor basis, when occurring over several floors it can add up to shortening that must be considered during design. For this reason, we recommend the specification of higher strength timber in the top and bottom plates used in high load areas – something that can be seen here with the use of an F17 hardwood. The use of this higher strength material effectively mitigates the crushing, making for a straight forward design and construction process.
Note that F17 LVL (as per the studs) would also perform this function adequately, however generic machine graded pine products would not be suitable for highly loaded areas.
Looking under the dis-assembleable section of the structure you can see a high performing wall type common in multi-residential developments. This partly finished wall is known as a discontinuous wall, and features two frames which have been installed approximately 20mm apart, making them completely independent of each other. This complete separation eliminates the direct transfer of vibration from one wall panel to the other, and when combined with the two layers of fire rated plaster board required to reach a 90/90/90 FRL, achieves an acoustic rating higher than all other cost competitive wall types for a similar depth. Indeed, when completed, the half-finished system here has been proven to provide an Rw+Ctr or airborne acoustic rating of 54.
While the section of wall shown here isn’t load bearing, it is important to note that discontinuous walls can be loadbearing, with floor cassettes bearing directly on to them. Where this is the case and 90mm timber studs are used, evidence suggests that timber party walls can perform more efficiently than is commonly seen in concrete post and slab designs, with wall thicknesses typically measuring up to 50mm thinner. While this may not seem like a lot a face value, a typical multi-residential project may feature hundreds of meters of party wall, and therefore this thinner panel may add tens of square meters in extra saleable area, and hundreds of thousands of dollars worth of extra revenue.
Note that where there are discontinuous party walls located above each other on consecutive floors it is important that there is a cavity barrier installed between floors to mitigate the spread of fire between sole occupancy units. While this is difficult to show in a full-scale model, if you look closely you can see a strip of high-density non-combustible insulation which has been inserted between floor cassettes, blocking the vertical spread of fire.
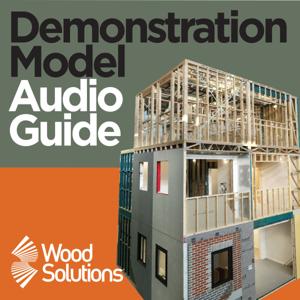
You may notice that this section looks a little different to the rest of the structure. There are no linings, services, or finishes in this section – only structure. The reason for this is that this section has been designed to be dis-assembled and re-assembled by project teams to better understand how panelised timber projects are put together. As you can see here, timber projects are typically made up of a variety of panels, whether they are mass timber panels as seen in the CLT on your left, stud frame panels as you can see in the LVL stud frames on your right, light weight cassette floors as you can see on the first floor, or massive timber floors as you can see on the second floor. Of particular interest here is the construction detail of the cassette floor, as this demonstrates two major forms of timber construction. As you can see, the cassette floor is sitting directly on top of the two stud frame walls, transferring load directly through all floor joist elements into the top plate of the walls. This is called platform construction, as the floor cassette for each floor makes a new platform on which load bearing walls can sit.
In contrast to this on the left-hand side you can see the connection between the floor cassette and the continuous CLT core panel via a whaler plate. This connection has been achieved by pre-installing an LVL element on the side of the core, on to which the edge of the cassette can sit. This allows for simple installation, as the floor element can sit under gravity loads while it is being fixed off, with no temporary propping required during install.
You might notice that this cassette is built out of a solid LVL rim board with light weight I-joists internally. While this configuration has been selected for display purposes, the composition of the cassette really comes down to the spans and loads of the structure.
A great benefit of timber construction, all edge protection elements were pre-installed before lifting, eliminating all live edges on the project. This is a common experience on timber projects and is one of the reasons why timber construction is so safe.
It’s interesting to note the temporary props that have been installed to support the wall panels here. While the props aren’t required to hold the structure up once fixed off, they have been left in this position to demonstrate their use during construction. Note the size of the props – the panels they support rarely total more than 2t in weight, avoiding the need to call on the big heavy props utilised in pre-cast concrete construction.
At this station you can see more of the massive timber core exposed. As you will see in more detail later in the tour, these panels are connected through the use of screws and brackets, and can be quickly and quietly installed on site. At the base of the core you can see a new plaster product used. A popular external lining in the United Kingdom, Siniat Weather Defence is an alternative the traditional water and fire rated plasterboards. It has been shown to perform as well as traditional fire rated plasterboard sheets under fire load and is manufactured complete with a water proof vapour permeable membrane integrally bonded into the face, reducing the number of work tasks on site. What’s more, with the use of fire rated joining tape or sealant, the Weather Defence system can deliver an airtight lining to the façade of a structure.
From the publisher's feed